You’ve watched the pros glide across waves with effortless style, and you’ve probably wondered what separates them from the rest of us. The secret isn’t just time in the water—it’s the work they do on land. A balance board is one of the most effective tools for building the stability, coordination, and muscle memory that translate directly to surfing. But simply standing on a board and wobbling around won’t cut it. You need a structured approach that mimics the specific movements and demands of surfing. This guide breaks down exactly how to use a balance board to improve surfing skills, covering the essential techniques, common mistakes, and how to structure your training for real results.
Why a Balance Board Works for Surfing
Surfing demands more than just strong legs. It requires a highly developed sense of proprioception—your body’s ability to sense its position and movement in space. A balance board forces your ankles, knees, and core to constantly micro-adjust, which is exactly what you need when you’re riding an unstable wave. This type of training strengthens the small stabilizer muscles that often get neglected in traditional gym workouts, building a foundation of strength that is specific to the demands of surfing.
Furthermore, balance training on land allows for a high volume of repetitions in a short amount of time. In the water, you might catch 20 waves in a session, each lasting only a few seconds. On a balance board, you can practice your stance and weight shifts for 20 minutes straight, accelerating your learning curve. This is why a balance board to improve surfing skills is a cornerstone of modern surf training, offering a controlled environment to build the neurological pathways you’ll use on every wave.
Getting Started: Choosing the Right Board and Setup
Before you start, you need to ensure you have the right equipment and a safe environment. Not all balance boards are created equal, and the type you choose will influence your training.
Types of Balance Boards
- Rocker Boards: These have a curved bottom and are great for beginners. They allow for forward and backward movement, helping you find your center of gravity.
- Wobble Boards: These have a hemisphere on the bottom, allowing for 360-degree movement. They are excellent for building ankle strength and stability but are less surf-specific.
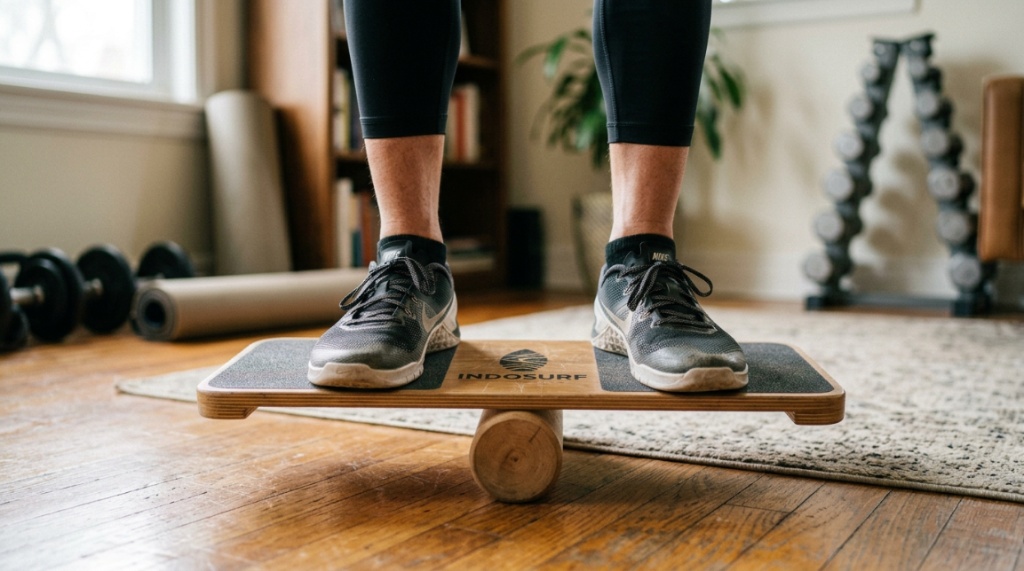
- Sphere and Roller Boards: This is the classic surf trainer. A board sits on top of a cylindrical roller, allowing for side-to-side movement that closely mimics the rail-to-rail transitions of surfing. This is the best choice for intermediate and advanced surfers.
Setting Up Your Training Space
Place your board on a non-slip surface, away from furniture with sharp corners. A doorway is a good spot to have a wall nearby for support when you’re starting out. Always wear bare feet to maximize feel and grip, and keep a towel nearby to wipe up any sweat. Start with a sturdy chair or wall within arm’s reach so you can quickly steady yourself if you lose your balance.
Core Drills to Build Surf-Specific Balance
Once you’re comfortable just standing on the board, it’s time to introduce movements that mimic surfing. The goal is to train your body to make these adjustments automatically, so you can focus on reading the wave instead of thinking about your feet.
Drill 1: The Basic Stance Hold
Start in your natural surf stance—feet shoulder-width apart, knees bent, and your torso facing forward. Your front foot should be angled slightly toward the nose of the board. The goal is to keep the board perfectly level for as long as possible. Focus on keeping your weight centered and your core engaged. This drill builds the foundational stability you need for everything else.
Drill 2: Rail-to-Rail Weight Shifts
This is the most important drill for surfing. With a roller board, slowly shift your weight from your toes to your heels, causing the board to tilt from one edge to the other. Imagine you are initiating a bottom turn or a cutback. Move with control, feeling the pressure move from the inside edge of your front foot to the outside edge of your back foot. This trains the exact weight transfer mechanics used to carve on a wave face.
Drill 3: The Pivot and Pop-Up
Once you’re comfortable with weight shifts, incorporate a pivot. From your basic stance, practice rotating your back foot to a new position, simulating the adjustment you make when setting up for a maneuver. For a more advanced challenge, place the balance board on the ground and practice your pop-up. Jump from your prone position into your stance on the board, focusing on landing with your feet in the correct position and immediately finding your balance. This is a powerful way to build the explosive coordination needed for catching waves.
Common Mistakes and How to Avoid Them
Many surfers make the same errors when they first start balance board training, which limits their progress and can even lead to injury. Being aware of these pitfalls will help you get the most out of your sessions.
- Stiff Legs: Locking your knees makes you rigid and unstable. Always maintain a slight bend in your knees to act as a shock absorber.
- Looking at Your Feet: Your eyes should be focused on a fixed point in front of you, just as they would be on the horizon while surfing. Looking down disrupts your equilibrium.
- Using Your Arms Too Much: While arms are important for balance, over-flailing them means you’re not engaging your core and legs properly. Try crossing your arms over your chest to force your lower body to do the work.
- Training for Too Long: Quality over quantity is key. A focused 10-minute session is far more effective than a distracted 30-minute session. Fatigue leads to sloppy form and bad habits.
Structuring a Weekly Training Routine
Consistency is more important than intensity. A short, daily practice will yield better results than a long session once a week. Here is a simple, effective routine you can integrate into your schedule, As you gear up to train your stability and organize your home fitness and surf equipment, remember to use a Surf Fin Holder to Keep Fins Organized so your gear stays pristine between sessions.
| Day | Focus | Duration |
|---|---|---|
| Monday | Basic Stance & Weight Shifts | 10 minutes |
| Wednesday | Pivot Drills & Pop-Ups | 10 minutes |
| Friday | Endurance & Free Surfing | 15 minutes |
On your “Endurance” day, try to maintain your balance for as long as possible without touching the ground. This builds the mental focus and muscular endurance required for long paddles and extended wave rides. Remember to always prioritize proper form over duration. As you get more comfortable, you can increase the difficulty by closing your eyes for short intervals or performing squats on the board.
Taking It to the Next Level: Advanced Techniques
Once you’ve mastered the basics, you can start to incorporate more dynamic movements that simulate advanced surfing maneuvers. This is where balance board training becomes truly surf-specific and fun.
Simulating a Bottom Turn
From your basic stance, aggressively shift your weight to your heels (backside) or toes (frontside) and hold the edge. Then, powerfully shift your weight to the opposite edge, simulating the top turn. Focus on the speed and power of the transition, not just the final position. This builds the explosive power needed for generating speed down the line.
Adding a Squat for Power
Incorporate a deep squat into your balance practice. From your stance, lower your hips as if you’re compressing for a maneuver, then explosively rise back up. This trains the leg strength and dynamic balance needed for powerful snaps and aerials. The instability of the board forces your core to work overtime to keep you upright, building a level of functional strength that is hard to replicate with other equipment.
Frequently Asked Questions
How often should I use a balance board for surfing?
For best results, aim for 3-4 sessions per week, each lasting 10-15 minutes. Consistency is more important than the length of each session. This frequency allows for adequate recovery while still providing enough stimulus to build muscle memory and strength.
Can a balance board help a beginner surfer?
Absolutely. Balance boards are excellent for beginners because they build the foundational stability and ankle strength needed to simply stand up on a surfboard. They also help you develop the correct stance and weight distribution before you even get in the water, which can significantly shorten the learning curve.
What is the best type of balance board for surfing?
The sphere and roller board is generally considered the best for surfing because its side-to-side motion closely mimics the rail-to-rail transitions of riding a wave. Rocker boards are better for absolute beginners, while wobble boards are more suited for general ankle stability rather than surf-specific movements.
How long does it take to see improvements in my surfing?
Many surfers notice improved stability and confidence within a few weeks of consistent practice. However, translating that balance to the water takes time. You’ll likely see significant improvements in your ability to stay on the board and execute smoother turns within 1-2 months of dedicated training.
Can I use a balance board if I have weak ankles?
Yes, but you should start slowly and use a wall or chair for support. Balance board training is an excellent way to strengthen the stabilizer muscles around the ankle joint, which can help prevent future injuries. However, if you have a current ankle injury, consult with a physical therapist before starting any balance training.
Conclusion
Using a balance board is one of the most effective ways to accelerate your surfing progress. It’s not a magic trick, but a form of targeted, functional training that builds the specific strength, coordination, and muscle memory you need to perform better in the water. By starting with the basics, focusing on surf-specific movements like rail-to-rail weight shifts, and avoiding common mistakes, you can turn dry-land training into real wave-riding success. Commit to a consistent routine, be patient with your progress, and you’ll notice a tangible difference in your stability and confidence the next time you paddle out.