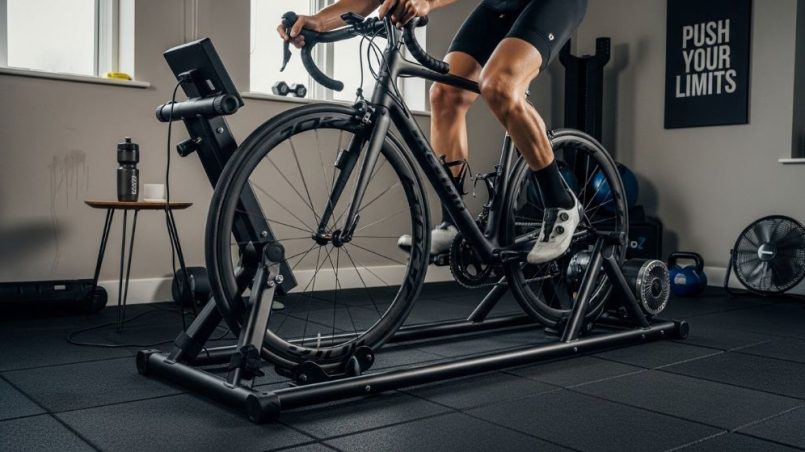
Indoor cycling has revolutionized the way athletes train throughout the year. Whether facing harsh winter conditions or managing a busy schedule, a reliable trainer stand keeps your fitness goals on track. However, choosing the right equipment requires careful consideration, especially for serious cyclists who demand durability and performance.
Understanding Your Training Needs
Before purchasing any equipment, evaluate your specific requirements. Casual riders have different needs compared to competitive cyclists. Think about your training intensity, frequency, and goals. Additionally, consider your physical attributes and the type of workouts you plan to complete.
Your body weight combined with your bike’s weight puts significant stress on training equipment. Therefore, understanding load requirements becomes essential. Most standard trainers support riders up to 250 pounds, but intense training demands more robust construction.
Why Durability Matters for Serious Training
Intense workouts generate tremendous force. Sprint intervals, standing climbs, and power training create lateral movement and downward pressure. Consequently, flimsy equipment can wobble, shift, or even collapse during vigorous sessions.
A high weight capacity trainer provides stability and safety during aggressive riding. This feature ensures the equipment handles dynamic forces without compromising performance. Moreover, durable construction extends the lifespan of your investment, making it cost-effective over time.
Key Features to Consider
Frame Construction and Materials
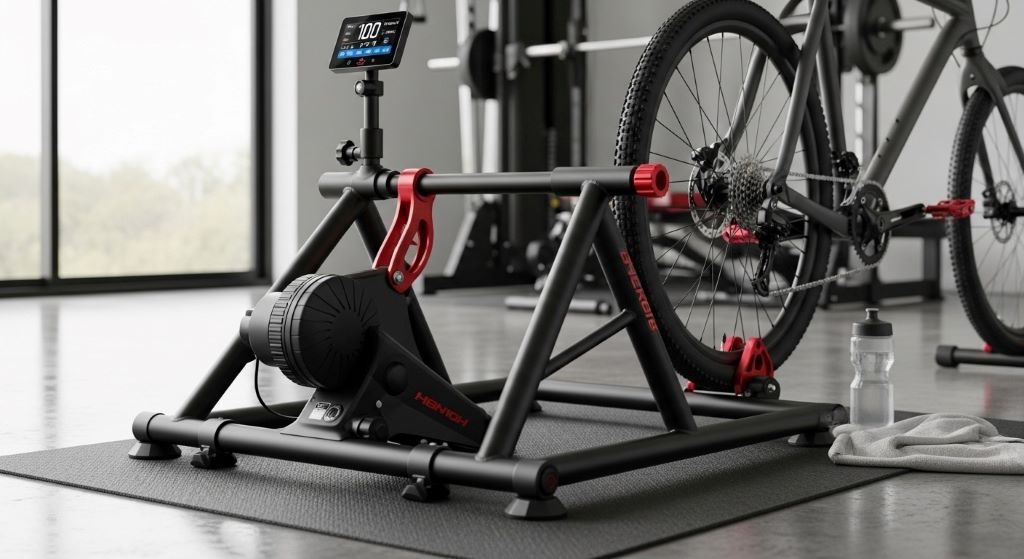
The foundation of any quality trainer lies in its construction. Look for models featuring heavy-gauge materials that resist bending and warping. A steel frame stand offers exceptional strength and longevity compared to lighter alternatives.
Steel provides natural vibration dampening properties. This characteristic reduces noise and creates a smoother riding experience. Furthermore, steel construction maintains structural integrity even after years of regular use.
However, not all steel frames are equal. Check the gauge thickness and welding quality. Reinforced joints and gussets indicate superior engineering. These details separate professional-grade equipment from consumer models.
Stability and Base Design
A wide base prevents tipping during out-of-saddle efforts. Measure the footprint to ensure it fits your training space while providing adequate stability. Adjustable feet allow leveling on uneven surfaces, which enhances safety and comfort.
Some designs incorporate tripod configurations, while others use rectangular bases. Each approach offers distinct advantages. Tripods typically occupy less floor space, whereas rectangular bases provide more stability during lateral movements.
Weight Capacity Ratings
Manufacturers list maximum weight limits for their products. Nevertheless, choosing a trainer rated well above your needs provides a safety margin. This approach accounts for the additional forces generated during intense efforts.
Remember that weight capacity includes both rider and bicycle. A 200-pound cyclist with a 25-pound bike requires equipment supporting at least 225 pounds. Therefore, selecting a model with a higher rating ensures adequate performance reserves.
Resistance Systems
Different resistance mechanisms suit various training styles. Fluid resistance offers quiet operation and progressive feel. Magnetic systems provide precise control and consistency. Direct-drive trainers eliminate tire wear but require higher initial investment.
Each system has trade-offs regarding noise, feel, and maintenance. Fluid units generate some sound from the spinning flywheel. Magnetic models tend to be quieter but may lack the natural road feel. Consider your priorities when evaluating these options.
Compatibility with Your Bicycle
Verify that your chosen trainer accommodates your bike’s specifications. Wheel size, axle type, and frame geometry all affect compatibility. Most modern trainers accept standard quick-release and thru-axle configurations.
Road bikes, mountain bikes, and gravel bikes have different requirements. Some trainers include adapters for various setups, while others require separate purchases. Check these details before committing to a purchase.
Assessing Build Quality
Welding and Joint Construction
Examine how frame components connect together. Clean, consistent welds indicate quality manufacturing. Rough or inconsistent welds may suggest cost-cutting measures that compromise durability.
Reinforced joints handle stress better than simple butt welds. Look for gussets or additional material at connection points. These features distribute forces more effectively across the frame structure.
Coating and Finish
Protective coatings prevent rust and corrosion. Powder coating offers superior durability compared to paint. This finish resists scratching and maintains appearance despite regular use and sweat exposure.
Some manufacturers apply multiple coating layers for enhanced protection. This attention to detail extends equipment lifespan, particularly in humid environments or when training generates heavy perspiration.
Hardware Quality
Inspect bolts, clamps, and adjustment mechanisms. Stainless steel hardware resists corrosion better than standard fasteners. Knurled knobs and levers should operate smoothly without excessive play or looseness.
Quality hardware maintains clamping force over time. Cheap components may loosen during use, requiring frequent adjustments. This inconvenience disrupts training flow and potentially compromises safety.
Space Considerations for Home Training
Footprint and Storage
Measure your available space before selecting equipment. Some trainers fold for storage, while others remain assembled permanently. Consider both setup and stored dimensions if space is limited.
Training areas benefit from adequate clearance around the bike. You need room for mounting, dismounting, and potential movement during efforts. Plan for at least three feet of space on each side when possible.
Noise Management
Vibration and sound transmission affect household harmony. Even quiet trainers generate some noise during use. Rubber feet and floor mats reduce vibration transfer to surrounding rooms.
If training in shared spaces or apartments, noise becomes more critical. Research sound levels and read user reviews regarding noise characteristics. Additionally, consider training times that minimize disturbance to others.
Budgeting for Quality Equipment
Initial Investment
Quality trainers require significant financial commitment. Prices range from a few hundred to several thousand dollars depending on features and construction. However, durable equipment provides better long-term value than cheaper alternatives.
Consider this purchase an investment in your fitness and cycling performance. Reliable equipment encourages consistent training by eliminating frustration and safety concerns. Moreover, quality trainers maintain resale value if you upgrade later.
Long-Term Cost Analysis
Factor in potential replacement and maintenance expenses. Cheap trainers may need frequent part replacements or complete replacement within a few years. Conversely, well-built models often last decades with minimal maintenance.
Calculate the cost per year of ownership when comparing options. A $800 trainer lasting ten years costs less annually than a $300 model requiring replacement every two years. This perspective helps justify higher initial spending.
Setup and Installation
Assembly Requirements
Most trainers arrive partially assembled and require basic tools for completion. Read reviews regarding assembly difficulty and instruction quality. Clear documentation and logical design make setup straightforward.
Some models require professional assembly or have complex adjustment procedures. Consider your mechanical aptitude and available tools when evaluating options. Complicated setups may necessitate additional expenses or time investment.
Calibration and Adjustment
Proper setup ensures optimal performance and accuracy. Many trainers require initial calibration for power or resistance readings. Follow manufacturer guidelines carefully to achieve correct baseline measurements.
Periodic recalibration maintains accuracy over time. Some systems offer automated processes, while others require manual procedures. Understand these requirements before purchasing to ensure they match your technical comfort level.
Maintenance for Longevity
Regular Inspection
Check frame integrity, hardware tightness, and wear indicators monthly. Tighten loose components promptly to prevent damage or safety issues. Look for cracks, rust, or unusual wear patterns that might indicate problems.
Clean accumulated dust, sweat, and debris regularly. Corrosive sweat can damage metal components despite protective coatings. Wipe down the frame after each use and perform thorough cleaning weekly during heavy training periods.
Component Replacement
Even durable trainers eventually need replacement parts. Resistance units, roller drums, and clamps experience the most wear. Source genuine manufacturer parts when possible to maintain performance and safety standards.
Keep spare hardware and commonly replaced items on hand. This preparation prevents training interruptions when components fail. Additionally, stock basic tools needed for adjustments and repairs near your training area.
Making Your Final Decision
Comparing Top Options
Research multiple models before committing to a purchase. Read professional reviews and user feedback from various sources. Pay attention to comments regarding durability, stability, and customer service experiences.
Create a comparison chart listing key features, prices, and ratings. This visual reference helps identify which options best match your requirements and budget. Eliminate models lacking essential features early in the process.
Where to Purchase
Buy from reputable retailers offering good return policies and customer support. Authorized dealers provide warranty coverage and genuine products. Avoid deeply discounted equipment from unknown sources, as these may be counterfeit or refurbished without disclosure.
Consider seasonal sales and promotions for better pricing. Many retailers offer discounts during off-peak cycling seasons. However, never compromise on essential features simply to save money.
Conclusion
Selecting the right trainer stand transforms indoor cycling from a chore into an effective training tool. Prioritize construction quality, appropriate weight ratings, and features matching your specific needs. A steel frame stand with high weight capacity provides the foundation for years of productive training sessions.
Remember that the best equipment balances durability, performance, and value. While initial costs may seem high, quality construction pays dividends through reliability and longevity. Take time to research options thoroughly, and choose equipment that supports your cycling goals without compromise.
Invest in your training infrastructure with the same care you apply to bike selection. The right trainer stand enables consistent, effective workouts regardless of weather or schedule constraints. Therefore, choose wisely and ride confidently knowing your equipment can handle whatever intensity you bring to each session.
Frequently Asked Questions
What weight capacity should I look for in a bike trainer stand?
Choose a trainer rated at least 50 pounds above your combined body and bike weight. This margin accounts for dynamic forces during intense efforts like sprints and standing climbs. Serious athletes should consider models rated for 350 pounds or more.
How do I know if a trainer has adequate stability for intense workouts?
Look for wide base designs with at least 24 inches of width. Read reviews specifically mentioning stability during out-of-saddle efforts. Additionally, check for reinforced frame construction and quality welding at stress points.
Can I use any bike with a heavy duty trainer stand?
Most quality trainers accommodate standard road and mountain bikes with quick-release or thru-axle systems. However, verify compatibility with your specific axle type and wheel size before purchasing. Some bikes may require adapter kits.
How much maintenance does a quality trainer require?
Well-built trainers need minimal maintenance beyond regular cleaning and periodic hardware tightening. Inspect the frame monthly for wear or damage. Resistance units may require replacement every few years depending on usage intensity.
Are expensive trainers really worth the extra cost?
Quality trainers justify higher prices through superior durability, stability, and performance. They last longer, require fewer repairs, and provide better training experiences. Calculate cost per year of ownership rather than focusing solely on initial price.
Related Topics:
How do bicycle springer forks work
How to Clean a Bike Chain Complete Pro Guideline