Yes, you can usually clear campervan clogged vents in Moab, UT, without professional service. Start by removing loose dust, then clean the vent screen, fan blades, and duct opening carefully. Moab’s BLM field office manages 38 campgrounds with more than 600 campsites. The area also serves more than 3 million visitors each year, increasing exposure to dust and outdoor debris.
That environment makes ventilation maintenance especially important during desert road trips. If you travel with outlander road trip vans, regular vent cleaning helps maintain steady airflow and cabin comfort.
Start With a Quick Vent Inspection
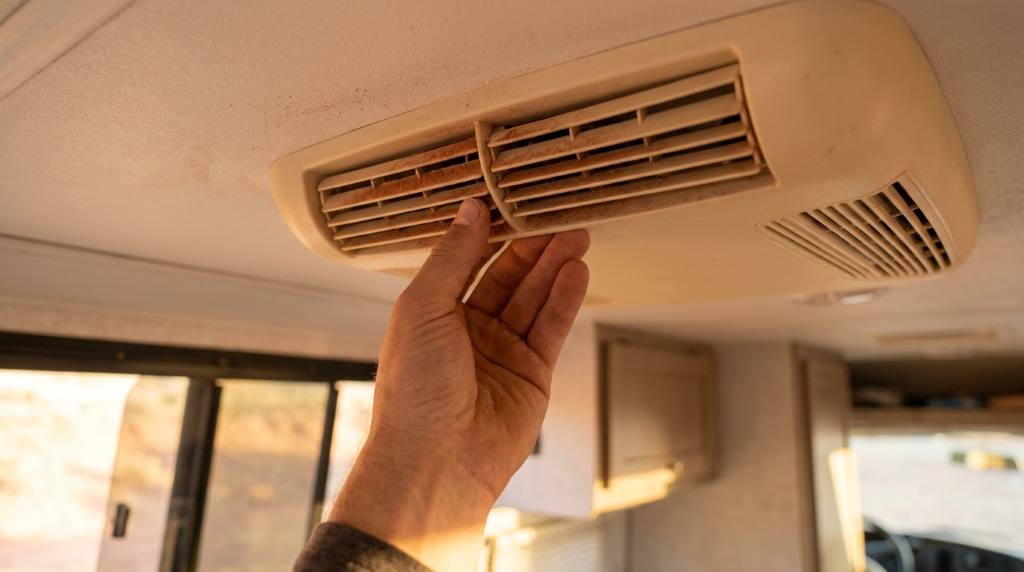
Before cleaning anything, turn off every fan connected to the clogged vent. Next, inspect the vent cover, mesh screen, fan blades, and surrounding ceiling area. Look for reddish dust, sand, hair, insects, leaves, or other debris blocking airflow. Also check whether the vent opens and closes without resistance.
Moab’s dry landscape can push fine dust into small openings around campervan equipment. Therefore, a vent can appear clean while its internal screen remains partially blocked. Shine a flashlight through the opening to identify hidden buildup before removing components.
If your campervan recently traveled over gravel roads, inspect every exterior vent. BLM camping areas around Moab include gravel access roads and primitive camping locations. Those conditions can introduce additional dust into ventilation systems during travel.
Check These Warning Signs
Pay attention when airflow suddenly becomes weaker than normal. A noisy fan can also indicate debris touching the blades or restricted airflow. Additionally, unusual smells may signal trapped organic material or moisture inside the vent.
- Weak airflow: Inspect the screen and duct opening.
- Rattling sounds: Check the fan blades for debris.
- Dust blowing inside: Inspect exterior seals and screens.
- Fan overheating: Stop operation and inspect for blockage.
- Persistent odor: Check deeper inside the ventilation pathway.
Remove Dust Without Damaging the Vent
Start with a soft brush or microfiber cloth for accessible dust. Then use a handheld vacuum around the vent cover and surrounding surface. Avoid forcing sand deeper into the duct because compacted debris can create a harder blockage.
For exterior roof vents, remove the cover only when your campervan manual permits removal. Keep screws and small clips together so you can reinstall everything correctly. Meanwhile, inspect the gasket for cracks because damaged seals can allow additional dust inside.
If your trip involves roadside assistance concerns, review breakdown cover for leasing before continuing remote travel. A clogged vent usually needs simple maintenance, but electrical faults require greater caution.
Use the Right Cleaning Tools
A small detailing brush works well around narrow vent openings. A vacuum with a soft brush attachment can remove loose particles without scratching plastic surfaces. For stubborn dust, use a slightly damp microfiber cloth after removing loose debris.
Never soak an electrical fan assembly during cleaning. Water can reach wiring, switches, or motor components and create electrical problems. Instead, dampen the cloth lightly and clean only accessible non electrical surfaces.
Compressed air can help with certain vents, but use it carefully. Excessive pressure may force dust deeper into the duct or damage delicate fan components. Therefore, vacuuming should remain your first cleaning method.
Clean the Screen, Fan, and Air Passage
Once loose dust disappears, focus on the screen because it often collects the finest particles. Remove the screen if the design allows safe removal. Wash a washable screen with mild soap and clean water, then let it dry completely.
Next, inspect the fan blades for compacted dust. Use a soft brush to loosen deposits without bending the blades. Then vacuum the loosened material before testing the fan again.
If your campervan uses several electronic systems, avoid disturbing unrelated wiring during vent cleaning. For example, learn about choosing right car audio before moving electrical components near other cabin equipment. Keeping each system untouched reduces accidental damage during routine maintenance.
Clean the Vent Duct Carefully
A partially blocked duct can reduce airflow even after cleaning the visible screen. Use a flexible brush designed for narrow ventilation passages when the duct design permits access. Move the brush gently rather than pushing hard against internal surfaces.
After brushing, vacuum loose debris from the opening. Then operate the fan briefly and check whether airflow improves. If dust continues entering the cabin, inspect the exterior cover and surrounding seal.
Do not dismantle a sealed ventilation assembly unless the manufacturer provides specific instructions. Some components contain electrical connections that require proper handling. When uncertain, stop cleaning and contact a qualified RV technician.
Fix Common Causes of Repeated Clogging
Cleaning solves the immediate blockage, but recurring clogs usually indicate another problem. Start by checking whether the exterior vent cover sits correctly. A loose cover can allow dust, insects, and moisture to enter repeatedly.
Next, inspect the vent screen for tears or missing sections. Replace damaged screening instead of patching large openings with temporary materials. A properly fitted screen keeps airflow moving while limiting debris entry.
Also inspect nearby roof seals for deterioration. Cracked sealant can create openings around the vent assembly and allow desert dust inside. If sealing material looks brittle, separated, or damaged, schedule proper repair before the next long drive.
Consider Your Camping Location
Camping conditions can affect how quickly vents become dirty. Moab’s BLM system includes campgrounds along highways, river corridors, and gravel roads. Some locations also experience strong gusts, which can move fine dust around your vehicle.
Therefore, inspect vents after driving on unpaved roads or camping during windy conditions. Keep roof vents closed while traveling through dusty areas when ventilation needs allow. Open them again after reaching a cleaner campsite.
For example, Hittle Bottom warns campers about possible gusty winds and summer thunderstorms. Those conditions make secure exterior equipment especially important during overnight stays.
Test Airflow Before Returning to the Road
After cleaning, reinstall every component exactly as designed. Check that the screen sits flat and the vent cover closes properly. Then turn the fan on its lowest setting and listen for unusual sounds.
Increase the fan speed gradually while checking airflow from the interior opening. Stronger airflow should feel consistent without excessive vibration or rattling. If the fan struggles, shut it off and inspect the blades again.
Also check whether air moves through the intended direction. Reverse airflow can indicate an installation problem or fan control issue. Correct the problem before relying on the vent during hot desert conditions.
Know When Cleaning Is Not Enough
Some ventilation problems require more than dust removal. A failed motor, damaged wiring, broken fan blade, or faulty switch needs proper diagnosis. Likewise, persistent water entry can indicate a roof seal problem rather than a clogged vent.
If the fan smells burnt, becomes unusually hot, or trips an electrical fuse, stop using it. Do not repeatedly reset a fuse because the underlying fault could worsen. Instead, arrange professional inspection before continuing your trip.
For mechanical problems elsewhere in the vehicle, understanding steering rack replacement work can help explain why some repairs need trained technicians. Vent cleaning remains simple, but electrical and mechanical repairs require different skills.
Prevent Campervan Vent Clogs During Future Moab Trips
Prevention works better than repeated deep cleaning. Inspect each vent before leaving town, especially after camping near dusty roads or open desert areas. A two minute inspection can prevent uncomfortable airflow problems later.
Keep a small cleaning kit inside the campervan for quick maintenance. Include a microfiber cloth, soft brush, handheld vacuum, mild soap, flashlight, and replacement screen material. Store these items together so you can reach them quickly.
Build a Simple Vent Maintenance Routine
Check exterior vents before every major travel day. Clean visible dust after extended gravel road travel. Then perform a deeper inspection every few camping days when conditions remain dusty.
- Before driving: Check covers, screens, and visible debris.
- After dusty roads: Vacuum accessible vent openings.
- After windy camping: Inspect exterior screens and seals.
- Every few days: Test fan airflow and sound.
- Before leaving Moab: Complete one final ventilation check.
This routine takes little time but protects airflow throughout the trip. More importantly, it reduces the chance of discovering a blocked vent during extreme heat.
Moab Specific Tips for Campervan Ventilation
Moab’s outdoor conditions require a slightly different maintenance mindset. Dust can settle quickly around exterior equipment, especially after travel on unpaved surfaces. Therefore, avoid leaving roof vents fully open when wind carries visible dust.
Campground conditions also vary across the region. Goose Island welcomes RVs and trailers, while some nearby BLM sites restrict larger vehicles. Always verify current campground rules and access information before traveling.
During hot weather, ventilation becomes especially valuable inside a parked campervan. However, keeping every vent open continuously can invite dust inside. Instead, balance airflow with current wind, dust, temperature, and campground conditions.
Protect Vents During Road Travel
Close vents according to the manufacturer’s travel instructions before moving the campervan. Secure loose covers and remove temporary cleaning materials from vent openings. Never place improvised objects over a vent while the fan operates.
After reaching your next campsite, inspect the vent before opening it fully. If you see accumulated dust, clean the screen first. This small habit prevents loose particles from entering the cabin when airflow starts.
Final Checklist Before Your Next Drive
A clean vent should move air freely without excessive noise or vibration. The cover should remain secure, while the screen should block visible debris without restricting airflow.
- Vent cover: Secure and free from cracks.
- Screen: Clean, dry, and undamaged.
- Fan blades: Free from heavy dust buildup.
- Duct opening: Clear of visible debris.
- Motor: Quiet and stable during operation.
- Airflow: Strong and consistent at multiple speeds.
- Seal: Intact around the exterior vent assembly.
If every item passes inspection, your ventilation system should remain ready for another desert drive. Keep your cleaning kit accessible and repeat the inspection after dusty conditions.
Conclusion
Clearing campervan clogged vents in Moab starts with inspection, gentle cleaning, and airflow testing. A soft brush, vacuum, microfiber cloth, and careful screen cleaning usually handle ordinary dust buildup.
However, recurring blockages can indicate damaged screens, poor seals, electrical faults, or deeper duct problems. Address those causes instead of repeatedly cleaning the same blockage. Most importantly, inspect your vents after dusty roads and windy camping conditions.
Before your next Moab adventure, add vent inspection to your daily vehicle routine. Keep your ventilation system clean, test airflow regularly, and seek professional help when electrical problems appear.
Frequently Asked Questions
Why do campervan vents clog quickly in Moab?
Fine desert dust, gravel roads, wind, insects, and outdoor debris can quickly collect inside campervan ventilation screens.
Can I clean a campervan vent without removing it?
Yes, you can remove loose debris using a soft brush, microfiber cloth, and vacuum around accessible openings.
Should I use compressed air on a clogged campervan vent?
Use compressed air cautiously because excessive pressure can push dust deeper into ducts or damage delicate components.
How often should I clean campervan vents in Moab?
Inspect vents before travel and clean them after dusty roads, windy camping, or several days outdoors.
When should I call an RV technician?
Contact a technician when the fan overheats, smells burnt, loses electrical power, or continues malfunctioning after cleaning.