
California kitchens face a unique set of challenges. Between the dry inland heat, the coastal humidity near the Pacific, and the intense year-round UV exposure through large windows, your kitchen cabinetry takes a beating. If your wood surfaces have started to look dull, chalky, or lifeless, you are not alone. The good news is that restoring and maintaining a beautiful shine is not about complicated routines—it is about understanding the material, choosing the right products, and adapting your approach to the specific climate conditions where you live. This guide dives deep into practical, region-specific strategies to help you improve kitchen wood shine in california without damaging your cabinetry or wasting money on the wrong products.
Key Takeaways
- California’s dry air and UV exposure require a different wood-care approach than what works in humid climates; hydration and UV protection are your top priorities.
- Always identify your wood’s finish (polyurethane, varnish, shellac, or oil) before choosing a product, because using the wrong cleaner will dull your cabinets faster than leaving them dirty.
- Heat-treated or white vinegar solutions can strip old wax and cause cloudiness; avoid homemade cleaning recipes when your goal is preserving a mirror-like shine.
- Establishing a monthly polishing schedule and an annual deep-clean cycle is the most reliable way to maintain clarity, depth, and gloss on kitchen wood.
Why Does Kitchen Wood Lose Its Shine in California?
Before you fix the problem, you need to understand why it is happening. Unlike furniture tucked away in temperature-controlled rooms, kitchen cabinets face daily temperature swings, steam from cooking, grease particles, and frequent touching. In California, three specific environmental factors accelerate the dulling process.
Low Indoor Humidity and Dry Air
During the hot summer months and the dry winter season in inland areas like Sacramento or Riverside, indoor humidity can drop sharply. When wood loses moisture, the fibers contract. This micro-level shrinking causes the finish to craze, or form tiny cracks, which scatters light rather than reflecting it. The result is a hazy, tired-looking surface that no amount of dusting can fix. Significantly, when indoor wood shrinkage occurs, the protective finish, especially water-based polyurethane, becomes stressed. The finish develops micro-cracks that capture dirt and create a white-ish haze.
UV Radiation and Sun Bleaching
Californians love natural light, but UV rays are harsh on wood. Sun exposure breaks down the chemical bonds in both the stain and the protective topcoat. In Mountain View or Santa Monica, west-facing windows can beam light directly onto cabinets for hours each day. This causes the color to fade or shift toward amber/orange, and it degrades the resin in the finish, leaving a dull, oxidized surface. The damage is progressive: the finish weakens first, then moisture and grime adhere to the porous surface, accelerating the overall loss of shine.
The Heat Factor of Glistening Stoves
Radiant heat from ovens, stoves, and dishwashers in the Bay Area is another key factor. When wood is repeatedly exposed to high heat, the resins in the finish can soften and then re-harden unevenly. This leaves a distinct film on the wood that looks blotchy and uneven under light. Additionally, grease from cooking — which floats in the air even when you use a vent hood — bonds with these uneven resin patches, creating a sticky, dull residue that attracts dust.
Determine Your Cabinet’s Finish First
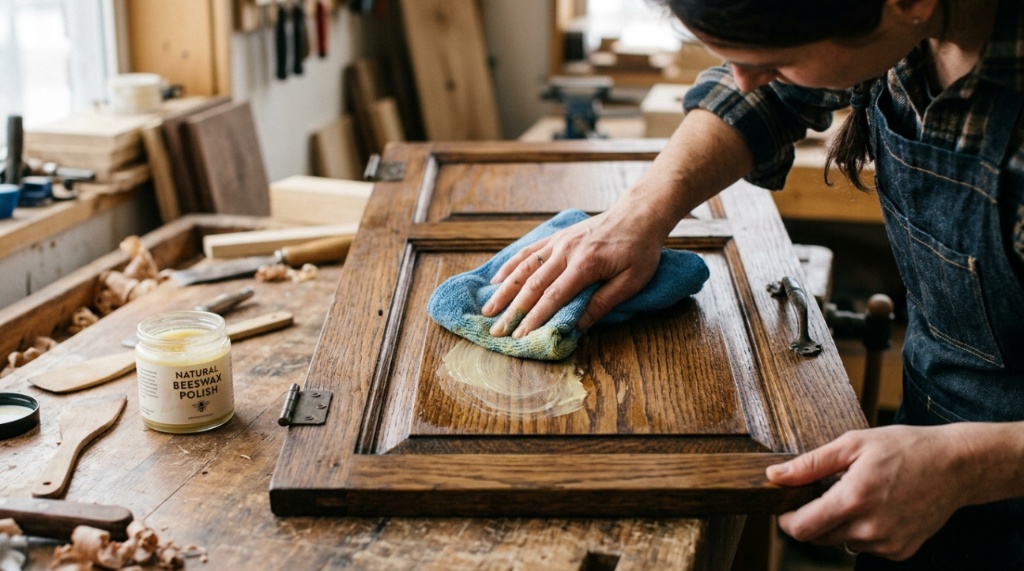
This is the single most important step in the process. You cannot purchase a polish or cleaner without knowing what is already on your wood. The product you use for a natural oil finish will be completely wrong for a lacquered surface.
| Finish Type | Shine Level | Key Characteristics | Best Maintenance |
|---|---|---|---|
| Polyurethane (Water or Oil Based) | Satin to High Gloss | Durable, plastic-like feel, water-resistant | Gentle pH-neutral cleaner + polymer polish |
| Varnish / Lacquer | Medium to High Gloss | Hard, brittle, can yellow with age | Solvent-based mild cleaner, avoid wax buildup |
| Shellac | Warm Glow | Soft, alcohol-soluble, traditional look | Dusting only; specialized wax, avoid water and alcohol |
| Natural Oil (Danish, Tung, or Linseed) | Matte to Low Satin | Wood penetrates freely, no hard film | Re-oiling needed; polish with oil-based conditioner |
| Conversion Varnish | High Gloss | Commercial grade, extremely durable | Thermal temperature care; avoid harsh degreasers |
The Water Test
If you are unsure what finish you have, place a few drops of clean water on an inconspicuous area inside the cabinet door. Wait fifteen minutes.
- If the water beads up: You have a surface film finish like polyurethane or varnish. The seal is intact, so you can safely use liquid polishes that contain light solvents.
- If the water soaks in and darkens the wood: You likely have a natural oil finish with no protective topcoat. Using standard furniture polish will sit on top and create a sticky mess. You will need to re-oil the wood to restore the shine.
How to Deep Clean Kitchen Cabinets Without Stripping the Shine
Most people make a critical mistake here: they reach for a general-purpose degreaser or warm water with dish soap. While effective at removing grease, these products can leave a residue or dry out the wood, negating any attempts to polish afterward. The correct method involves using a cleaner specifically formulated for wood, and a change in your physical technique.
- Dust first, always. Use a soft microfiber cloth or a vacuum with a brush attachment to remove all surface grit. If you wipe with a wet cloth over dust, you create a mud-like paste that grinds into the finish and causes tiny scratches that kill the shine.
- Mix the correct solution. Use only a pH-neutral wood cleaner mixed with water. Avoid alkaline cleaners (bleach, ammonia) and acidic solutions (vinegar). These strip the oils from the existing finish.
- Wipe with the grain. Use a damp (not soaking wet) cloth. Start at the top of the cabinet door and wipe down using a straight, single direction—following the direction the wood grain runs. Do not scrub in circles. Rinse the cloth frequently as you work.
- Dry immediately. Water remaining on the finish for more than a minute can seep into micro-cracks. Use a second, dry, soft cotton cloth to dry the surface immediately after cleaning. This step alone will instantly improve reflection clarity. To complete your kitchen’s aesthetic overhaul while working on your interior style, check out this guide on how to Give Your Kitchen a Vintage Vibe.
The Best Polish Strategy for a High-Gloss Reflection
Once the cabinets are clean and completely dry, it is time to add the shine. However, there is a difference between cleaning and polishing. A polish doesn’t clean; it adds luminous depth and lubricates the surface to prevent fingerprints from sticking.
Silicone vs. Non-Silicone Polishes
You will see two main types of polish at the store. Silicone-based polishes provide an immediate, glass-like shine with minimal effort. However, in California’s heat, silicone can dry out and leave a white film when it degrades. More importantly, if you ever need to recoat your cabinets with another finish, silicone prevents adhesion, meaning the new paint or varnish will peel. For a sustainable shine, choose a polymer-based polish (often called “wax-free” or “resin polish”) that uses synthetic resins to build a breathable, durable layer of shine that doesn’t attract dust.
Application Technique
Do not spray the polish directly onto the cabinet surface—you might overspray the hinges or the wall. Spray a small amount onto a soft cloth. Apply the polish in a thin layer. Wait for it to haze slightly (about 30 seconds), then buff with a second clean cloth using firm pressure. This friction is what creates the “mirror” finish. You are essentially heat-setting the polymers to create a smooth film.
Professional Restoration: When to Avoid DIY Rash Moves
If your cabinets are severely cloudy, peeling, or have water stains that have penetrated the finish, polishing will not help. You may need to address the bare wood or topcoat.
Rubbing Out the Finish
For scratched or cloudy polyurethane and lacquer, a process known as “rubbing out” can restore shine without extensive sanding. You use automotive-grade micro-abrasives (like rubbing compound or polishing compound) to gently level the surface finish, removing the micro-scratches that cause haze. This step requires specialized equipment, such as a variable-speed polisher, and a very steady hand. It is successful because the finish is thick enough on the wood surface to tolerate the polishing.
Dehumidifying and Humidifying the Kitchen Space
To protect the shine long-term in California, manage the airflow. Running a dehumidifier? In many California areas, you do not need to; instead, integrate the wood-care routine with the seasonal shift. During the hot, arid months, run an energy-efficient cool-mist humidifier near the kitchen (provided there is no exposed wood flooring directly in a wet area). This keeps moisture in the air, preventing the amber amberization and drying out of the topcoat. During the foggy, wet season along the coast, use your range hood fan while cooking to keep moisture from condensing on the wood, as constant wetness will cause cloudiness in the finish.
Heat Treatment vs. Chemical Strippers
If you have to strip the wood entirely, consider a heat gun instead of chemical strippers. Chemical strippers are harsh, release toxic fumes, and can leave deep stains in the wood if they sit too long (which is easy to do indoors). Using a heat gun to soften varnish and lacquer allows you to scrape it off in controlled strips, preserving the integrity of the wood underneath and prepping it for a fresh coat that will shine beautifully.
Common Mistakes That Wreck Kitchen Wood Shine
Avoiding these pitfalls is just as important as taking positive action:
- Using olive oil or lemon oil: These kitchen ingredients go rancid. They attract dust and become sticky, ruining the finish within a year.
- Polishing in direct sunlight: If you polish in a sunbeam, the polish or cleaner will dry too fast, leaving streaks and causing uneven haze. Work when the light is diffuse.
- Using paper towels: Paper towels are abrasive. They contain wood fibers that scratch polyurethane. Always use cotton cloths or high-quality microfiber.
- Painting over a greasy surface: This applies to renovation projects. If you plan to paint over existing wood, the grease must be completely removed. However, avoid degreasers that leave films. TSP (trisodium phosphate) is a classic choice, but it must be rinsed thoroughly with clear water before applying primer or paint.
How to Maintain the Shine Long-Term
Consistency is key. A weekly wipe-down with a dry cloth prevents dust buildup. A monthly polish (using the method above) maintains the depth. Yearly, perform a thorough deep clean and consider applying a new coat of rub-on poly or high-quality furniture wax to refresh the top layer.
Remember that a gritty, cloudy finish in California is not a sign of poor quality wood; it is a signal that the topcoat is stressed. Check the humidity levels in your home—aim for a range between 40% and 45% relative humidity if possible. In dry climates, you may need to polish more frequently (every two weeks) during the peak summer heat to replenish lost conditioners.
Frequently Asked Questions
Why does my wood look chalky after I clean it?
Chalkiness usually indicates a buildup of wax or cleaning residue. You have likely used too much product, or you are using an oil-based cleaner over a water-based polyurethane finish. To fix this, wipe the surface with a mild solution of water and distilled white vinegar (1 part vinegar to 4 parts water) to cut the residue, then re-polish with a dry cloth.
Can I use vinegar to clean my kitchen cabinets?
While vinegar is an excellent degreaser, it is acidic. Frequent use can eat away at the resin in the topcoat, leaving a dull, etched appearance over time. It is better to use it sparingly on hardware, not on the wood finish itself. If you do use it, dilute it significantly and rinse off the residue quickly.
How often should I polish kitchen wood in a warm climate?
In a warm or coastal climate, the topcoat dries out and degrades faster. You should deep clean once a month and polish every two to four weeks. Additionally, consider applying a conditioner with a UV blocker every six months to combat sun damage.
Is it safe to use commercial “orange oil” cleaners?
Orange oil (d-limonene) is a solvent that dissolves grease quickly. However, on a lacquer or shellac finish, it can soften the finish and cause it to become gummy. It is safe on pre-finished oiled woods but risky on modern spray lacquers. Always test in an inconspicuous spot first.
What is the fastest way to increase shine without buying new products?
Use the friction method. After cleaning the wood, apply a tiny amount of standard water-based cleaner to the surface and buff it with a dry, soft cotton t-shirt. The friction creates static heat that temporarily smooths the film and darkens the color slightly, creating an immediate glass-like effect that lasts a few days.
Conclusion
Improving the shine on your kitchen wood in California is not an impossible task; it is a matter of using the correct technical approach for our specific climate. Start by identifying whether you have a film finish or an oil finish. Then, shift your routine away from harsh degreasers and toward pH-neutral products and conditioners. Remember that sunlight and dry air are your primary enemies; incorporate regular polishing to build a protective barrier against them. By following the deep cleaning techniques and avoiding common mistakes like using silicone-heavy polishes, you will see a dramatic improvement in the clarity, depth, and visual warmth of your cabinetry. Commit to weekly dusting and monthly polishing—the effort pays off with a kitchen that looks carefully maintained, bright, and reflective for years to come.