You walk into your living room, and there it is—a small puddle of water beneath your aquarium. Your heart sinks. An aquarium leak is every fish keeper’s nightmare. It threatens your fish, your floor, and your peace of mind. The good news? You don’t always need a new tank. With the right approach, you can repair aquarium leaks. Safe glue can be your best friend. But not all glues are created equal. Using the wrong adhesive can poison your fish or fail under pressure. This guide walks you through exactly how to identify, prepare, and fix leaks using aquarium-safe products that protect your aquatic life and restore your tank’s integrity.
What Makes a Glue Safe for Aquarium Leak Repair?
Not every adhesive labeled “waterproof” is safe for fish. A safe aquarium glue must be non-toxic once cured, inert in water, and resistant to constant moisture. The most reliable options are 100% silicone sealant (without mold inhibitors), epoxy putty, and cyanoacrylate-based super glues. Products with anti-mold chemicals, solvents, or acetic acid (vinegar smell) can leach toxins into the water and harm your fish. Always check the label for “aquarium-safe” certification or use products specifically designed for aquatic environments.
Key Properties of a Fish-Safe Adhesive
A truly safe glue must cure into a solid, non-leaching material. It should not break down over time, discolor the water, or create sharp edges. Silicone sealants must be 100% silicone—avoid any labeled “mold resistant” or “kitchen and bath” as they contain biocides. Epoxies must be labeled “food-safe” or “aquarium-safe.” Cyanoacrylate glues (super glues) are safe once fully dry but should be used sparingly for small cracks or chip repairs.
Common Unsafe Glues to Avoid at All Costs
Stay away from standard household glues like Elmer’s, white glue, wood glue, or general-purpose epoxy from hardware stores. These contain solvents, fillers, or anti-fungal agents that can kill fish instantly. Even some “waterproof” construction adhesives are not formulated for submerged life. When in doubt, ask your local fish store or research the specific product brand online before applying it to your tank.
Why “Aquarium-Safe” Certification Matters
Manufacturers test aquarium-safe products for leaching, pH stability, and general toxicity. Brands like Aqueon, Marine Land, and Loctite’s marine line have established reputations. Using a certified product ensures your repair aquarium leaks safe glue won’t harm your fish or plants. Always buy from reputable aquarium retailers or manufacturers with clear product descriptions.
How to Locate the Exact Source of an Aquarium Leak
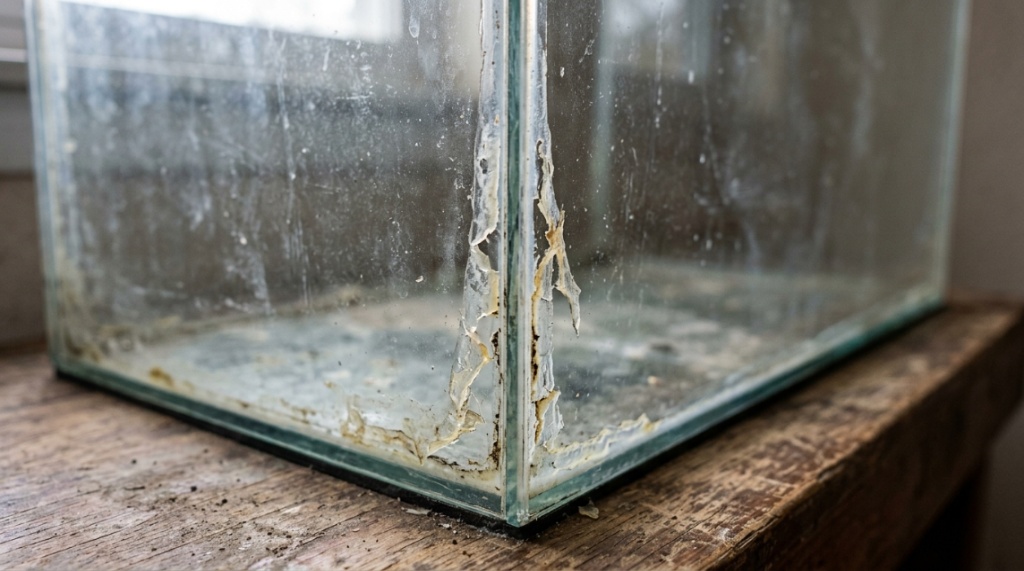
Before you apply any glue, you must find where the water is escaping. Many leaks appear at the seams (corners), along the bottom edge, or near filter holes. Dry the outside of the tank completely, then look for hairline cracks or moisture trails. If you can’t see the leak, fill the tank with water and add a few drops of food coloring to help trace the flow. Alternatively, press a paper towel along the seams to detect damp spots.
Visual Inspection Techniques for Glass and Acrylic Tanks
For glass tanks, run your fingers along every silicone seam. Feel for unevenness, gaps, or soft spots. Use a flashlight to illuminate the corners—cracks can be nearly invisible to the naked eye. For acrylic tanks, look for white stress lines or cloudy areas, which indicate micro-fractures. Mark the exact spot with a piece of tape so you don’t lose it during repair.
Water Test to Confirm Leak Location (Without Flooding)
Drain the tank to just below the suspected leak. Wait 30 minutes and check for new wetness. If the leak stops, you’ve pinpointed the vertical position. Then refill to the same level and watch for drips. For bottom leaks, empty the tank completely, dry the bottom, and pour a thin layer of water on the glass. Bubbles or wet marks will reveal the breach.
When a Leak Is Too Dangerous to Repair
Large cracks (longer than 2 inches) or cracks running through the center of a glass pane often mean structural failure. Similarly, if the leak is at the bottom panel where the entire water weight presses, a repair may only be temporary. In these cases, replacing the entire pane or the tank itself is the safer option. Small seam separations or chips at edges are usually repairable.
Which Glue Type Works Best for Different Leak Types?
The ideal glue depends on where the leak is and what material your tank is made from. 100% silicone sealant is best for resealing entire seams or fixing gaps between glass panels. Cyanoacrylate super glue works well for small cracks or chip repairs on glass or acrylic. Epoxy putty is excellent for filling larger holes or cracks in acrylic tanks. Each product has strengths and limitations, so choose based on the leak’s size and location.
Silicone Sealant for Seam Leaks (Glass Tanks)
Silicone is the go-to for separating seams. It remains flexible, adheres strongly to glass, and forms a waterproof bond. When you repair aquarium leaks safe glue of this type, you must remove the old silicone first. Silicone will not stick to old, dirty silicone. Use a razor blade to scrape away the old seal, clean the area with rubbing alcohol, apply a fresh bead, and smooth it with a wet finger. Let it cure for 24-48 hours before refilling.
Cyanoacrylate for Small Cracks and Chips
For hairline cracks or chipped edges, cyanoacrylate (super glue, like Loctite’s aquarium-safe formula) is ideal. It flows into tiny gaps, bonds instantly, and is non-toxic once dry. Apply a small drop directly into the crack, then hold the edges together for 30 seconds. Wipe away excess immediately. This works on both glass and acrylic but is best for cracks not under extreme pressure.
Epoxy Putty for Holes and Acrylic Repairs
Epoxy putty (such as AquaMend or J-B WaterWeld) is a two-part clay that hardens into a durable, waterproof patch. Perfect for larger holes, cracks in acrylic, or filling gaps around bulkheads. Knead the putty until uniform, press it into the damaged area, and shape it smooth. It cures underwater and bonds to wet surfaces, making it ideal for emergency repairs without draining the tank fully.
How to Prepare Your Aquarium for a Safe Glue Repair
Preparation determines whether your repair lasts or fails. You must empty the tank completely (or at least below the leak), remove the water, and dry the area thoroughly. Use a razor blade or putty knife to remove any old silicone, algae, or debris. Clean the surface with isopropyl alcohol (70% or higher) to remove oils and residue. Let the area air-dry for at least 30 minutes before applying any adhesive.
Step-by-Step Drying and Cleaning Process
Start by draining the tank into buckets. If you have fish, move them to a temporary holding container with tank water and a filter. Remove any decorations or substrate near the leak. Use a brand-new razor blade to scrape away old silicone. Avoid scratching the glass. Wipe the area with a lint-free cloth soaked in alcohol. Let it evaporate completely. Do not use soap or detergents—they leave residues that prevent adhesion.
Protecting Your Fish During the Repair
Fish are sensitive to fumes and vibrations. Move them to a separate container with aquarium water, a heater, and a sponge filter. Keep them in a quiet, warm place while the glue cures. If you are using silicone, the acetic acid smell can be strong, so ventilate the room. Never apply glue directly into water with fish present. Wait until the glue is fully cured and rinsed before reintroducing your fish.
Tools and Materials You Will Need
Have everything ready before you start: 100% silicone sealant (aquarium-safe), caulking gun, razor blades, rubbing alcohol, lint-free cloths, tape, and a putty knife. For cyanoacrylate repairs, have a small tube and an accelerant (optional). For epoxy, knead the putty just before use. Wear gloves to avoid skin contact and keep a damp paper towel nearby to clean up excess.
Can You Repair a Leak Without Draining the Entire Tank?
Yes, but only for small leaks above the waterline or for emergency patches using epoxy putty. For leaks at the bottom or along submerged seams, you must drain the tank to below the leak level. Underwater repairs are possible with specialized epoxy putties that cure in water, but they are less reliable than dry repairs. For the strongest bond, always drain and dry the area.
Emergency Underwater Patching (Temporary Fix)
If you discover a leak at 2 a.m. and cannot drain the tank, epoxy putty can be applied directly underwater. Press the putty firmly into the crack or hole while water is still present. It will harden within minutes. This is a temporary fix only. You should still drain, dry, and properly repair the area within a few days to ensure long-term integrity.
Risks of Repairing Underwater vs. Dry
Underwater repairs often have weaker adhesion because the glue cannot bond fully to a wet surface. Silicone will not cure underwater at all. Cyanoacrylate may bond but can become brittle. Epoxy putty works best underwater but may leave an uneven patch. For peace of mind, especially on large tanks or heavily stocked aquariums, a dry repair is always safer.
When You Absolutely Must Drain the Tank
Drain the tank if the leak is at the bottom seam, if the crack is longer than 1 inch, or if the leak is actively dripping. Also drain if the repair involves replacing a section of silicone. A full drain allows you to access both sides of the glass, apply pressure evenly, and ensure the glue cures properly. Never risk a partial repair on a high-pressure seam.
How to Apply Silicone Sealant for a Permanent Fix
Applying silicone correctly ensures the repair lasts for years. After cleaning and drying the area, cut the tip of the silicone tube at a 45-degree angle to match the gap size. Load the tube into a caulking gun. Apply a continuous, even bead along the seam, pressing firmly to fill the gap. Use a wet finger (dipped in water with a drop of dish soap) to smooth the bead and remove excess. Let it cure undisturbed for 48 hours.
Removing Old Silicone (Critical Step)
New silicone will not stick to old silicone. Use a razor blade to scrape away every trace of the old seal from both glass surfaces. Pay extra attention to corners where silicone tends to build up. After scraping, wipe with alcohol. Any residue will cause the new seal to fail. This step is time-consuming but non-negotiable for a permanent repair.
Proper Bead Size and Smoothing Technique
The silicone bead should be about 1/8 to 1/4 inch thick, depending on the gap. Too thin, and it may not hold; too thick, and it may drip or cure unevenly. After applying the bead, run your wet finger along it in one smooth motion. This presses the silicone into the seam and creates a concave shape that strengthens the bond. Do not over-smooth—one or two passes are enough.
Curing Time and Water Testing
Let the silicone cure for at least 24 hours, but 48 hours is better for full strength. Keep the tank in a warm, dry room. After curing, fill the tank with water and let it sit for 24 hours to check for leaks. Place paper towels beneath the repaired seam to detect any moisture. If the leak persists, you may need to reapply or consider a different repair method.
How to Use Cyanoacrylate Glue for Hairline Cracks
Cyanoacrylate (super glue) is ideal for tiny cracks or chips that don’t involve the main seam. Clean the crack with alcohol and dry it completely. Apply a small drop of glue directly into the crack. If the crack is very fine, use a thin viscosity formula that wicks into the gap. Hold the edges together for 30-60 seconds. Wipe away any excess with a paper towel. The glue will dry clear and waterproof.
Choosing the Right Viscosity
Thin cyanoacrylate (like water viscosity) flows into hairline cracks and bonds instantly. Thick gel formulas work better for larger gaps or vertical surfaces. For aquarium use, choose a formula labeled “aquarium-safe” or “marine-grade.” Avoid standard super glues that contain plasticizers or solvents. Loctite Professional Liquid or Starbond are common choices among hobbyists.
Application Tips for Crack Repair
Apply the glue from the inside of the tank if possible—water pressure pushes the seal outward, so an internal patch is strongest. If you can only access the outside, apply multiple thin layers, letting each dry completely. Avoid using too much glue, as it may drip or create a bump. For cracks longer than 1 inch, reinforce the repair with a small piece of acrylic or glass glued over the area.
Limitations of Cyanoacrylate Repairs
This glue works best for non-structural cracks. It is not designed to hold large panels together or seal leaking seams. It can become brittle over time under constant water pressure. If the crack is near the bottom or under heavy stress, consider a full silicone seal or panel replacement instead. Always monitor the repair for several weeks after refilling.
Which Epoxy Putty Formulas Are Best for Aquarium Leaks?
Epoxy putty is a two-part clay that hardens into a rock-solid, waterproof material. It’s excellent for filling holes, repairing cracks in acrylic tanks, or sealing around bulkheads. Look for brands like AquaMend, J-B Weld WaterWeld, or Loctite Marine Epoxy. These are non-toxic once cured, can be applied underwater, and bond to glass, acrylic, plastic, and metal.
How to Mix and Apply Epoxy Putty
Cut off an equal amount of both parts (resin and hardener). Knead them together with your fingers until the color is uniform—usually 1-2 minutes. You have a working time of 5-10 minutes before it starts hardening. Press the putty firmly into the damaged area, overlapping the edges by at least 1/2 inch. Smooth it with a wet finger or putty knife. Let it cure for at least 1 hour before testing.
Pros and Cons of Epoxy vs. Silicone
| Feature | Epoxy Putty | Silicone Sealant |
|---|---|---|
| Application | Underwater possible | Must be dry |
| Flexibility | Rigid | Flexible |
| Best for | Holes, cracks, acrylic | Seams, glass panels |
| Cure time | 1-24 hours | 24-48 hours |
| Water test | After 1 hour | After 48 hours |
Choose epoxy if you need a hard, durable patch. Choose silicone if you need a flexible, seamless bond along a seam.
When to Use Epoxy for Bulkhead or Pipe Repairs
If your leak is around a bulkhead fitting or PVC pipe, epoxy putty is ideal. It conforms to irregular shapes and forms a watertight seal. Clean the area, dry it if possible, and press the putty around the fitting. For underwater repairs, push the putty firmly into the gap and hold for 2 minutes. It will harden and seal the leak without removing the fitting.
How to Test Your Leak Repair Before Adding Fish
Never put fish back into a tank immediately after a repair. After the glue has cured (24-48 hours), fill the tank with fresh water and let it sit for at least 24 hours. Check for drips, damp spots, or changes in water level. Use paper towels along the repaired area. If no leaks appear, then proceed with reintroducing your fish. This test protects your fish from both leaks and residual chemicals.
Visual and Tactile Inspection
After filling, run your fingers along the repaired seam. There should be no soft, sticky, or tacky spots. The glue should be firm to the touch. Look for bubbles forming around the repair—they indicate a weak spot where water is seeping between the glue and the glass. If you see any, drain and reapply.
Water Chemistry Check for Residual Toxins
Test your water parameters (ammonia, nitrite, pH, and hardness) after 24 hours. If the glue is not fully cured, you may see a spike in ammonia or pH shift. A sudden change suggests the glue is leaching chemicals. Drain the water, let the repair cure longer, and test again. Only reintroduce fish after parameters are stable and safe.
How to Prevent Future Aquarium Leaks
Prevention is easier than repair. Regular maintenance and careful handling can significantly reduce leak risks. Inspect your tank seams every month. Avoid bumping the tank or leaning on it. Use a leveling mat under the tank to distribute weight evenly. Never place the tank near direct sunlight or heat sources, which can degrade silicone over time. And always use high-quality, aquarium-safe products from the start.
Routine Seam and Glass Inspections
Every month, look at the silicone seams for yellowing, cracking, or separation. Run your finger along the inside corners—if you feel a gap, it’s time for a reseal. Check the glass for scratches, chips, or stress marks. Small problems caught early are easy to fix; neglect can lead to catastrophic failure.
Choosing Quality Equipment and Setup
Invest in a properly built tank from a reputable manufacturer. Thicker glass or acrylic is less likely to crack. Use a leveling system like a foam mat or wooden stand to prevent uneven pressure. Ensure filter hoses and bulkheads are properly fitted without over-tightening, which can crack the glass. A quality setup reduces the chance of leaks significantly.
Frequently Asked Questions
Can I use regular silicone for aquariums?
No. Only use 100% silicone that is labeled “aquarium-safe” with no anti-mold additives. Regular bathroom or kitchen silicone contains chemicals that are toxic to fish and will not cure safely underwater.
How long does aquarium glue take to cure?
Silicone sealant requires 24–48 hours to fully cure and become waterproof. Cyanoacrylate (super glue) cures in 30–60 seconds. Epoxy putty hardens in 1–24 hours depending on the brand and thickness.
Will the glue smell harm my fish?
The fumes from silicone or cyanoacrylate can harm fish if they are exposed directly. Always move fish to a separate container during the repair and ventilate the room. Once the glue is fully cured, it releases no harmful fumes.
Can I repair a cracked aquarium glass panel?
Small cracks (under 2 inches) can be repaired with epoxy or cyanoacrylate. Larger cracks or cracks through the middle of a panel typically require panel replacement or a new tank. Always assess the structural integrity before attempting a repair.
Is clear or black silicone better for repairs?
Both clear and black silicones are equally effective. Clear is less noticeable on glass, while black blends into corners and seams better. Choose based on your aesthetic preference. Both must be 100% silicone and aquarium-safe.
How do I remove old silicone from glass?
Use a new razor blade held at a 45-degree angle. Scrape gently to avoid scratching the glass. For stubborn residue, use a silicone remover solvent (available at hardware stores) or rubbing alcohol. Always clean the area thoroughly before applying new glue.
What should I do if the leak returns after repair?
If the leak reappears, the original repair may not have been fully cleaned or the glue may not have been appropriate. Strip the old glue completely, re-clean the area with alcohol, and reapply fresh glue. If the leak persists, the tank may have structural damage requiring professional repair or replacement.
Final Thoughts on Repairing Aquarium Leaks Safely
Discovering a leak in your aquarium is stressful, but with the right knowledge and tools, you can often fix it yourself without replacing the entire tank. The key is using repair aquarium leaks safe glue that is non-toxic, properly matched to your tank material, and applied with care. Whether you choose silicone, cyanoacrylate, or epoxy, always prioritize your fish’s safety by allowing full cure times and testing thoroughly. Regular inspections and quality equipment will help you prevent future leaks. Take action now—inspect your tank today, fix small issues before they become disasters, and enjoy a leak-free aquarium for years to come.